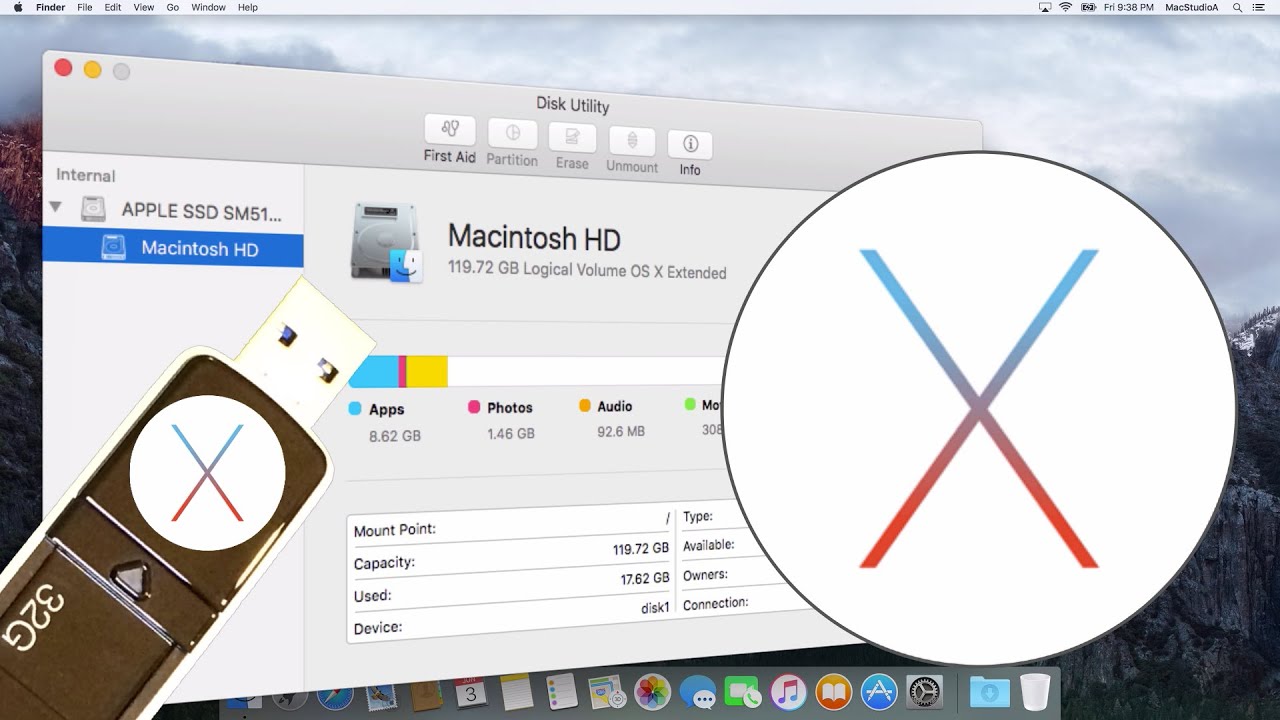
Using New Disk Utility Clean Install OS X El Capitan from USB Boot Disk. How To Clean Install OS X El Capitan Using Disk Utility. Clean Install OS X El Capitan 10.11. SUBSCRIBE For More Videos Like This:http://goo.gl/88PNgx How To Create a USB Boot Disk Using OS X El Capitan: https://youtu.be/prLb00eRA0Y My MAIN Camera: https://amzn.to/2OBWusS External Dummy Battery for Camera: https://amzn.to/2RLgNGr Backup Power Bank I use: https://amzn.to/2RLe8MX ND Filter I use: https://amzn.to/2OyY8eI The Camera Mic I use: https://amzn.to/2JRjK5s My Lapel Mic: https://amzn.to/2JSE4mQ Must have Gadget for Recording HDMI Output: https://amzn.to/2Dslv93 Get those crisp overhead shots with this tripod: https://amzn.to/2PIOcnV Versatile Super Tripod Clamp: https://amzn.to/2DvXPk2 Mini Tripod I use: https://amzn.to/2PNePrx My iPhone Tripod Mount: https://amzn.to/2DvD8Vh LED Spot Lighting I use: https://amzn.to/2JSDZjd LED Wide Angle Lighting: https://amzn.to/2Dvuu9w My Scenery LED Kit: https://amzn.to/2DtVjKZ My Storage Devices: For Video Editing SSD: https://amzn.to/2PMRhTD USB 3.0 SSD External Enclosure I use: https://amzn.to/2DvDoUf USB 3.0 Flash Drive I use: https://amzn.to/2SXu4wU My High Speed Camera Card: https://amzn.to/2Fanhxe External Storage Drive I use USB Version: https://amzn.to/2JUlWta External Storage Drive Thunderbolt & USB Version: https://amzn.to/2RIZ82c Recommended Gear: RAID Thunderbolt 3 External Hard Drive: https://amzn.to/2POl2Ul 2TB Thunderbolt and USB 3.0 Portable Hard Drive: https://amzn.to/2DvLX1u 4TB USB-C and USB 3.0 Portable Hard Drive: https://amzn.to/2JRzF3N 5TB Rugged Thunderbolt / USB-C Mobile Drive: https://amzn.to/2PNfzwP Variable Friction Magic Arm: https://amzn.to/2qEhJ3S Rode VideoMic Pro Plus: https://amzn.to/2yZ1Tp0 Follow me on: http://instagram.com/sergesiou https://twitter.com/SergeSiou Performed and Tested On MacBook Air (Late 2013) Using: OS X El Capitan 10.11.5 and a 32 GB USB 3.0 Flash Drive. Apple's Intel Based Systems: Mac Mini iMac Mac Pro MacBook Air MacBook Pro TRANSCRIPT: /2016/06/clean-install-os-x-el-capita-using-disk-utility.html In this episode, How To Clean Install OS X El Capitan Using Disk Utility. We’ve already shown How To Create a USB Boot Disk Using OS X El Capitan from the previous episode. Before proceeding with the steps involved in doing a clean install of OS X El Capitan, it should be noted that your system hard drive, in most cases, know as your Macintosh HD, will be erased. Therefore, it’s very important that you’ve done or already have a backup of your important files. Furthermore, where appropriate, I’ve time-lapse some of the procedures. Straight to the Demo. Soooooooo, Let’s Get Started. Shut down your Mac and insert your El Capitan boot disk in an available socket. Now, press and hold down the Option key Immediately after you turn on your Mac and hear the startup sound. Keep holding the Option key till the Startup Manager appears. Next, Double-click on the Install OS X El Capitan icon or click on the icon and click the up-arrow symbol, where you’ll then see a desktop with an OS X menu bar. Now, you’ll either see an OS X El Capitan splash screen or an OS X Utilities window as shown. If you saw the OS X Utilities window, double-click Disk Utility and if you saw the OS X El Capitan Splash screen, click Utilities from the menu bar and select Disk Utility… From the Disk Utility window, select Macintosh HD, then the Erase Button, shown here. Make sure the Format is as shown, Mac OS Extended (journaled) and the default Name Macintosh HD (you can change the name if you wish) Then press the Erase Button here. This will Erase all data and reformat the current Macintosh disk, this takes about 10 seconds. After Erasing the Macintosh HD, quick Disk Utility. You’re now back to either the OS X El Capitan splash screen or the OS X Utilities window as before. It’s now time to Install OS X El Capitan. Just click the Continue Button from the splash screen or double-click Install OS X from the OS X Utilities window. After agreeing to the terms, select the Macintosh HD that was just Erased and finally, click on the Continue or the Install Button. I’ll just time-lapse the remaining process from here. In my case, the Installation took about 25 minutes, where the Mac will auto boot, and you’ll be presented with the screen to setup your Mac. After entering the necessary details, you’ll be presented with the El Capitan Desktop. And that’s all there is to it. Thanks for watching and thumbs-up if you liked this video, and please, don't forget to click that subscribe button to be notified of the next episode. Thanks and Peace.
Using New Disk Utility to Install OS X El Capitan - YouTube |
| 75 Likes | 75 Dislikes |
| 12,083 views views | 5,549 followers |
| Science & Technology | Upload TimePublished on 6 Jun 2016 |
Không có nhận xét nào:
Đăng nhận xét